WearML Embedded Tutorial
Introduction
This tutorial will walk you through the steps required to customize your Android application using WearML Embedded to optimize it for the HMT.
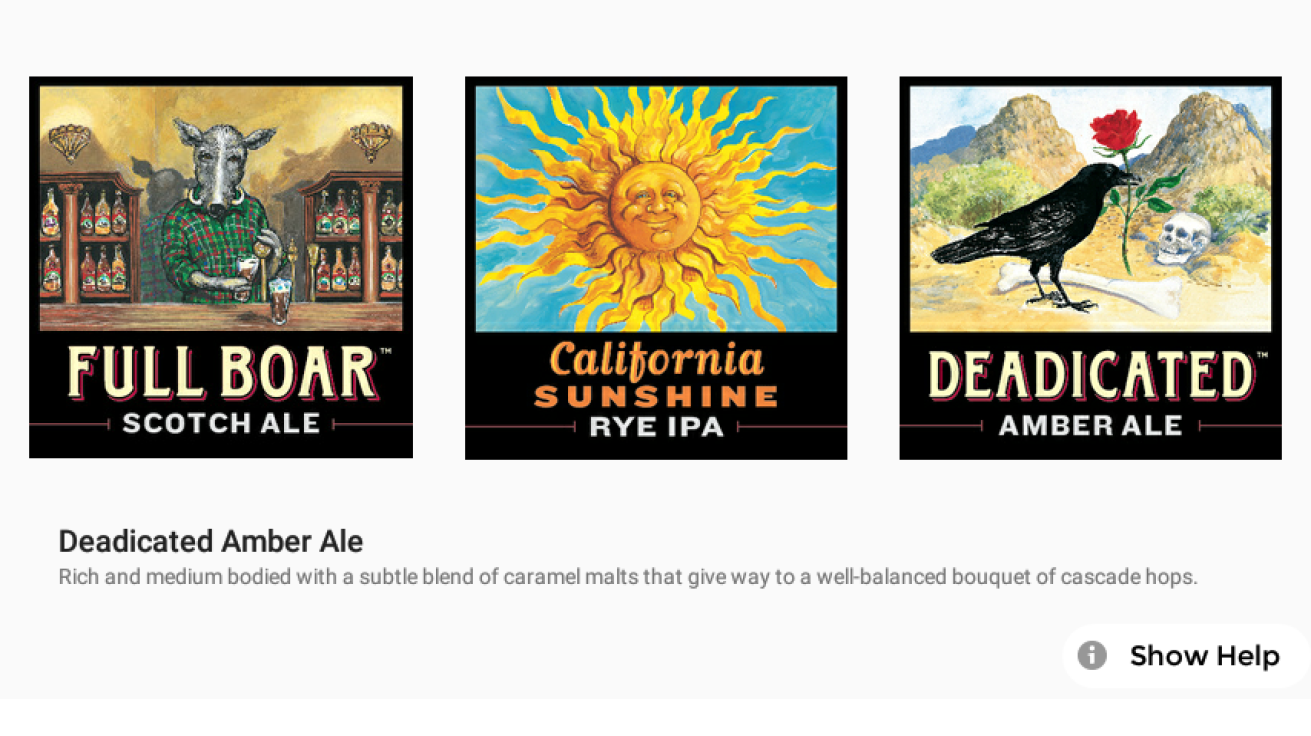
The tutorial uses a simple “Devil’s Canyon Application” which consists of a single screen containing 3 logos showing some delicious beers.

Selecting each logo will show a short description about each beer.
Installation
For this tutorial you will need to have RealWear Explorer installed on your computer. Information about RealWear Explorer can be from the RealWear Explorer page.
The Devil’s Canyon application can be downloaded as a compiled APK ready to be installed.
Contents of zip
- DevilsCanyon.apk – The Devil’s Canyon application without any modifications
Source code and more information can be found on the Devil Canyon’s Product Page.
Install application
When getting your application ready for the HMT, the first step is to install it to understand which functions WearHF will support automatically. For help installing the APK see our installation instructions.
WearHF will automatically interrogate the UI tree of the application and detect the 3 logos as buttons. WearHF will then assign voice commands to these buttons.
Once installed run the Devil’s Canyon app.
Since the buttons don’t have any strings associated with them WearHF is unable to assign a corresponding command, so instead defaults to a “Select item X” format. This allows the user to select each item using the voice commands “Select Item 1”, “Select Item 2” and “Select Item 3”. Using the global “Show Help” command will display an overlay over each item so the user can know which command belongs to which beer.
While this shows the application working on the HMT it would be great if we can tell WearHF how to understand the application a little better. This is what WearML was designed for.
Add button speech commands
The first task in optimization is to add speech commands to the clickable icon buttons. Remember, we recommend a say-what-you-see paradigm, so we will use the text from the images as the commands.
This is done by adding a WearML directive into the activity_main.xml layout file. WearML directives are always added into a contentDescription attribute of an element. In this way, most Android systems will ignore the directive, and only HMT will pick it up and use it. This allows Android applications to be modified for HMT, but still be designed primarily for touch-based systems.
To add voice commands to the image buttons, simply add a android:contentDescription="hf_use_description|Full Boar" line to the XML that describes the first clickable button. This will tell WearHF to use the speech command “Full Boar” for this button. Job done – this button is now optimized for hands-free!
Next steps: repeat with the other two image buttons, adding a suitable on-screen label and hence voice command.
<ImageButton
	android:id="@+id/boar"
	android:layout_width="wrap_content"
	android:layout_height="wrap_content"
	android:onClick="onBoarClick"
	android:src="@drawable/boar"
	android:layout_weight="1"
	android:scaleType="fitCenter"
	android:background="@null"
	android:layout_marginLeft="5dp"
	android:contentDescription="hf_use_description|Full Boar" />
Clean up
Now that all elements on the screen have useful speech commands, and the user can see what to say, we can do some clean-up.
The first task is to remove the numeric indices. These are no longer needed, and serve only to clutter the screen.
In this case there is a single WearML directive to turn off the numeric indices: “hf_no_number”. We add to the top level layout object.
<?xml version="1.0" encoding="utf-8"?>
<LinearLayout xmlns:android="http://schemas.android.com/apk/res/android"
    android:layout_width="match_parent"
    android:layout_height="match_parent"
	android:orientation="vertical"
	android:contentDescription="hf_no_number">
When all of these modifications are saved, compiled and run, the Devils Canyon application now looks like below. All user interface elements are labeled, so the user knows what to speak, and there is no additional clutter on the screen.
Final note
There are many other directives available which can be used to fully optimize you application. For a full list see out WearML Embedded API.